Making Your Own Princess Purse
See, this is why I need a girl . . .

Maybe it’s because I’m a boy mom, and am used to super heroes and camo, but are these not the most adorable little girl purses you’ve ever seen?
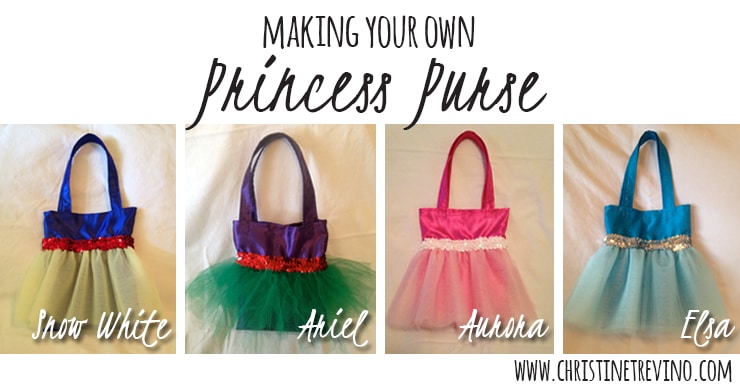
I’ve taken a bit of a respite from boy costumes and have been stitching up these adorable bags for my little girl friends. I have thoroughly enjoyed the girly side of sewing!
Each 8.25″ X 10″ bag is made of sparkly satin, lined with a complimentary patterned fabric, and accented with tulle and sequined ribbon. They are great for play, but could also be used in place of a flower girl basket, halloween accessory, or Easter basket.
The BEST part is that they are SUPER easy to make on your own by following these simple six steps.
What you need
- 15″ cut of sparkly satin (off the bolt)
- 10″ cut of complimentary fabric (also off the bolt)
- 1 yard tulle
- 18″ cut of 1-1/2 wide sequined ribbon
- Small square of velcro
- Matching thread
How to make it
1. Cut your fabric

Out of the satin, cut one piece 28″long X 9″wide for the body of the bag (hint: create a pattern for a rectangle 14″long X 9″wide and place it on the FOLD before cutting), and cut two pieces 17″ X 2.5″ for the handles.
Out of your complimentary fabric, cut one piece 14″X9″ for the liner of the bag (hint: create a pattern for a rectangle 7″long X 9″wide and place it on the FOLD before cutting).
Out of the tulle, cut 8 strips, 1 yard X 7 inches each.
2. Pin & seam purse fabric
You will always pin fabric in this step with the”right side” of your fabric facing “in.”

Pin along the right and left sides of the satin body of your bag (which should measure 14″ X 9″ with the fold along the bottom), and seam.
Pin along the right and left sides of the complimentary fabric (which should measure 7″ X 9″, with the fold along the bottom), and seam.
Fold each satin shoulder strap in half long-ways, pin the open edges of the fabric together towards the right (which should measure 17″ X 1.25″ with the fold to the left), and seam.
Turn the seamed satin body of the bag, the complimentary fabric, and both satin shoulder straps right-side out.
3. Create the tutu

Carefully line up all 8 strips of tulle on one of the long sides of the fabric and pin them together. This is a great time to trim any edges to make them even, but don’t stress out if it isn’t perfect. Remember that gathering tulle is very forgiving!
Using the basting option on your machine, seam the long edge without finishing either end. Pull one strand of thread on either end to gather the tulle to approximately 18″ in length.
4. Attach the tutu and sequined ribbon

Pin the gathered tulle to the “right” side of the satin, leaving the ends to overlap in the middle of the back of the bag. Switch your machine settings from basting to seaming, and seam the tulle to the bag.
Pin the sequined ribbon to cover the seam of the tulle, leaving the ends to overlap in the middle of the back of the bag. If you are not a hand-stitcher, switch your machine settings back to basting, and SLOWLY stitch the sequined ribbon to the bag/tulle being careful to remove pins as you go – I’ve broken my needle on every bag so far!
You will baste the sequined ribbon twice: once on the bottom of the ribbon (over the tulle) and once on the top of the ribbon. If using your machine makes you nervous – the sequined ribbon can also be tacked to the bag by hand.
5. Seam the inside of the bag to the outside

Turn the satin part of your purse (that now has the tulle and sequined ribbon) right side “in.” Pin and seam to the complimentary fabric (turned right side “out”). Seam, leaving approximately 5 inches to turn the entire purse right side out.
Once the purse is turned, finish off the 5 inch hole by tucking the unfinished ends “in,” pinning, and seaming to close.
After you’ve smoothed out the fabric for both the insides and outsides to lay flat, finish the purse by running a seam along the top.
6. Attach handles and velcro

Finish the handles by running a stitch on both of the long sides of each strap. Turn the ends of both sides under and stitch. Attach handles to the bag 1-1/2 inch from either side, finished side to the inside of the bag. Attach a small square of velcro to the center of each side of the bag.
Voila! You just made your own princess purse in six simple steps!
