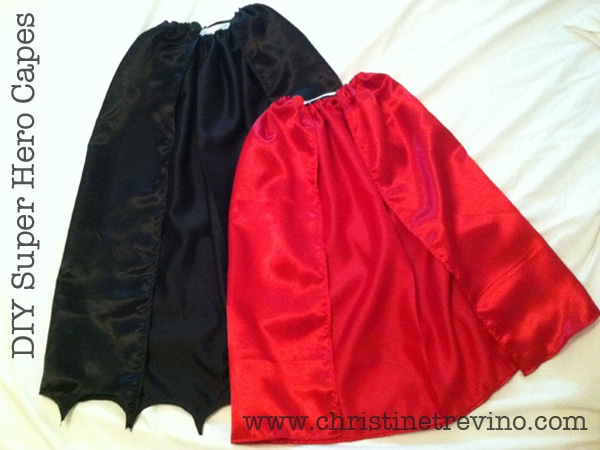
DIY Super Hero Capes (Child & Adult)
I’ve learned super-hero costuming is year round apparel in our house. Last year’s Blue Batman and Baby Robin costumes were designed with time (to complete) and cost (think cheap) in mind. I expected they’d only be worn for Halloween – which was true for my growing baby boy, but Elijah’s worn his out. For this year’s costumes I’m focusing on functionality and durability with less emphasis on how long and how much.
As a result, here is my new take on the super-hero cape. My favorite feature of this cape is that once it is completed, there is no need to fasten and unfasten it. Because the cape’s shape is held together with elastic, it easily goes on and off over the head. And it looks really cool when it’s trailing behind you :).
Supplies for Child Cape
43″ wide costume satin X length in inches from shoulder to floor
1/4″ elastic
1 – 7/8″ Button
Dritz Fray Check (for Batman Cape only)
Supplies for Adult Cape
43″ wide costume satin X length in inches from shoulder to floor X 2
1/4″ elastic
1 – 7/8″ Button
Dritz Fray Check (for Batman Cape only)
Directions
1. Trim any unclean edges of the satin.
2. For the adult cape, seam the two lengths of fabric together in the middle. Flatten the seamed edge to one side, and make a running stitch along the folded edge to tack the seamed edge down.
3. For both, seam the left, right, top and bottom edges of the cape (I used the edge of the presser foot as a guide). If you are making a Batman cape, do not seam the bottom edge.
4. Using the original seam as a guide, turn, pin & seam the left, right and bottom edges of the cape to finish edges. If you are making a Batman cape, do not seam the bottom edge.
5. Turn the top edge of the cape at the seam, pin and and seam the edge down.
6. Fold the newly seamed top over 1″, pin and seam. Use the left side of the presser foot as a guide for the new seam.
7. For Batman cape ONLY: The Batman Cape has a scalloped bottom. Create a scallop pattern along the bottom of the cape starting in the middle, alternating between a cup and your finger. Cut and seam around the scallop pattern. When finished apply Dritz Fray Check along the scallop seam and allow to dry according to package instructions.
8. Measure a length of 1/4″ wide elastic loosely around subjects shoulders. Make a generous allowance.
9. Using a safety pin attached to one end of the 1/4″ elastic, feed through the top of the cape (from left to right). Sew the left end in place and bring the safety pin through the right side.

10. Gather cape fabric toward the left end of the elastic and using your subject place the left end on the left collar bone, and the right end on the right collar bone. Mark and sew right side of elastic to the cape. There should be excess elastic hanging out of the top right side of the cape.
11. Sew a color-coordinating button to the top left corner of the cape.

12. Using your subject determine the length needed to attach the cape with elastic to the button. Stitch a loop in the elastic (that will go over the button to fasten the cape together).
The finished product . . .


